The previous article in this series detailed the basics of lead nurturing and its benefits. To build on this strong foundational understanding of lead nurturing, we have created the below comprehensive step-by-step guide to help you get started with your own program. Use these eight steps to create a lead nurturing workflow that will reduce the total cost of acquisition and cost per lead, plus create a consistent sales experience with content that is engaging and relevant to a prospect’s stage in the sales journey.
1. Know your customer journey
As always, everything starts with understanding the customer journey. If you haven’t already defined the customer sales journey for your business, you can get started by reading our article, understanding the customer journey.
2. Define sales processes
Once you understand the customer journey, you can then determine the actions that are required by sales and marketing to support customers through their sales funnel journey. At this stage, it is important to bring sales and marketing teams together to define sales processes to:
- Ensure sales and marketing processes are aligned
- Achieve consensus on definitions of a lead, conversion, attributes of a high-value lead, MQL, SQL and any other traits relevant to your organisation.
- Agree where to implement lead nurturing and automation within the sales journey
- Define the stage in the sales funnel where lead nurturing and automation efforts will hand over to the sales team
- Confirm the actions and behaviours that will trigger lead nurturing efforts, and those that will move prospects from nurturing to the sales team
3. Segment customers
When nurturing is correctly executed, it delivers relevant and personalised content. But it must account for the differences in your customer base. Each of your customer segments will have different challenges and will be seeking different information during the sales journey. Segmenting customers based on a few clear characteristics, such as their function (finance vs. operations vs. human resources) will ensure you deliver relevant, impactful content. Once segments are defined, sales and marketing collaborate to brainstorm relevant content for each segment across the customer journey.
To learn more, check out our article on customer segmentation.
4. Select communication channels
The most effective communications channels for engaging with your customer will depend on what you’re selling and potentially the customer segment. It’s important to determine the channels you will be using across the different stages of the customer journey, as content should be written and presented differently depending on the channel. Consider all your channel options (email, digital advertising, SMS, social media etc.), measure their past performance and align the best-performing channels with your segments to ensure the chosen communication methods are relevant to your target customer.
5. Map content topics across the customer journey
The key to creating content is to first understand each customer segment’s interests, pain points and needs, and then find an angle that highlights your business’ point of difference. When determining the topics to cover, you can start by considering the questions customers often ask, current industry trends and your company’s unique selling point. Content should be varied – think step-by-step guides, client case studies, white papers, videos, infographics…get creative!
Once you have your topics confirmed, align them with each relevant stage of the customer journey. Once your content mapping is complete, look at the big picture to make sure your content is equally spread across each stage of the customer journey. If there are gaps at a certain stage, regroup to create some more content topics.
6. Create a workflow
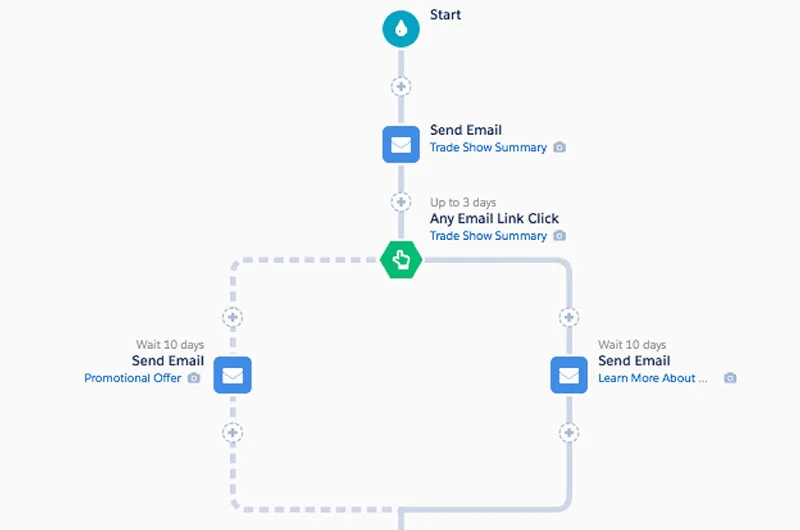
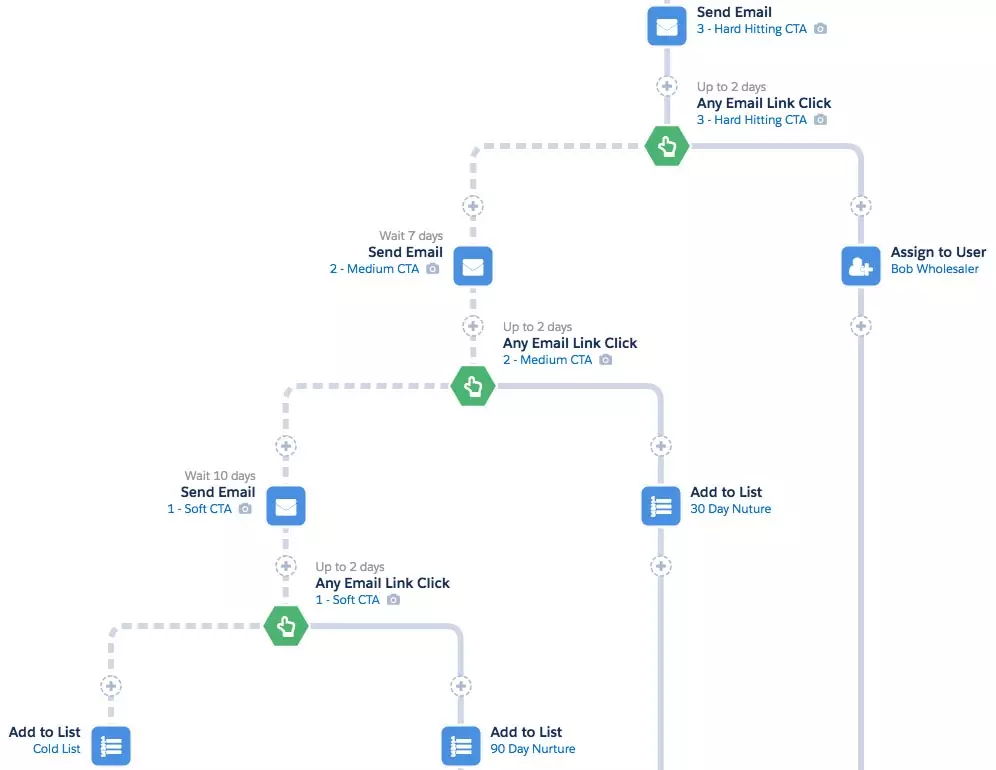
When planning a content workflow, it can be helpful to create a flowchart that maps prospective customers’ engagement behaviours and your response to them. For example, you might start by sending an EDM. If the prospect opens the email, then the response would be to send a more detailed, customised email. If the prospect ignores the email, the response might be to resend the original email after a specified amount of time. You’ll need this workflow mapped out for each customer segment, so we recommend starting with one group and then repeating the process for each other segment.
It is possible to create your workflow within your marketing automation tool. When using Pardot, we love to create our workflow using Engagement Studio.


Once you’ve developed your workflow, you can identify where you can use automation to nurture leads through the sales journey. At this stage, you can determine the additional content you need to develop e.g. follow up EDMs for responsive and unresponsive prospects.
7. Develop content
It’s time to start creating content. Your goal is to make every piece of content easy to understand and ensure it delivers tangible insights that will help customers make decisions. Don’t forget to include a call to action!
8. Start your lead nurturing campaign and test ROI
Lead nurturing isn’t a ‘set and forget’ exercise. Once you kick-off your initial campaign, you will start collecting data on where content is driving engagement and where it is not. Use this data to constantly update and tweak your approach to maximise conversion. But don’t act too soon! It takes a couple of months – approximately the length of your sales cycle – to get a realistic understanding of how content is performing. So only make content tweaks after you have given your content a chance to shine.
Conclusion
We hope our 101 and 102 insights articles have taken some of the mystery out of lead nurturing. We recommend you start small and build on your program as you gain confidence and learn more about your customers and the type of content they find the most engaging.
As always, contact us with any questions or requests for extra information. Fluent Group can help you choose the right CRM and automation software for your own lead nurturing program, and assist with creating your unique workflow.

